|
|
| Home-->F1 Rocket Project-->Wings Page 5 |
|
SITE CONTENTS
Please send your comments and suggestions to: Copyright
© 2002-2005 by |
Links
on this page: NACA Inlet Heated Pitot Tube |
|
|
NACA Inlet
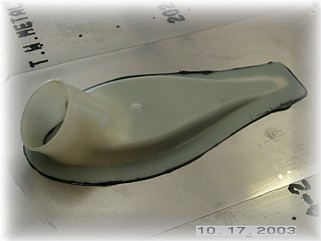
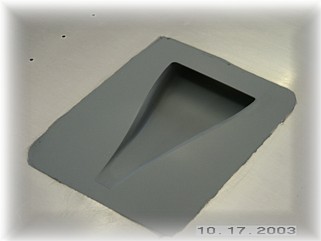
I installed the NACA inlet with Proseal. After it dried, I filled the edges with body filler and sanded them smooth. A little primer was all that was needed to finish it up.
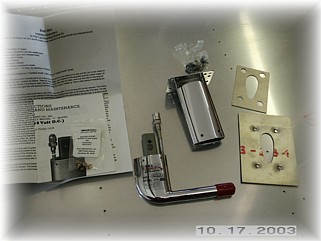
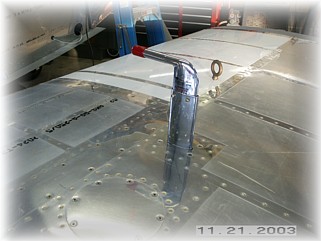
I am using a heated pitot tube from Gretz Aero. The instructions are pretty self explanatory. I picked the bay just outside the outboard inspection plate. That way, I can still reach my hand inside to connect up the pitot and electrical connections.
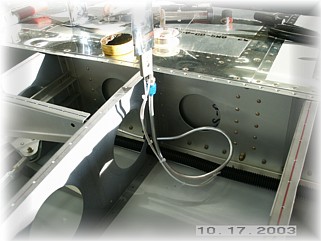
The first step was to run some aluminum tubing for the pitot connection. I ran it just below the electrical conduit. I ran the tube through some plastic bulkhead fittings. I then cleaned up the mounting plates and drilled them to the spar and corresponding rib per the instructions. When it is finished, the chrome mast slides inside the wing so that the connections can be completed. Then the mast is slid into place and held there by four mounting screws. The pitot tube mounts to the mast with four small screws.
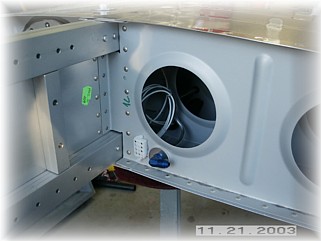
This is what the completed pitot tube looks like. I also took a picture of the inside end rib. This is where the wiring and pitot line terminate. This completes the left wing. |
||
|
"There is no excuse for an airplane unless it will fly fast!" |