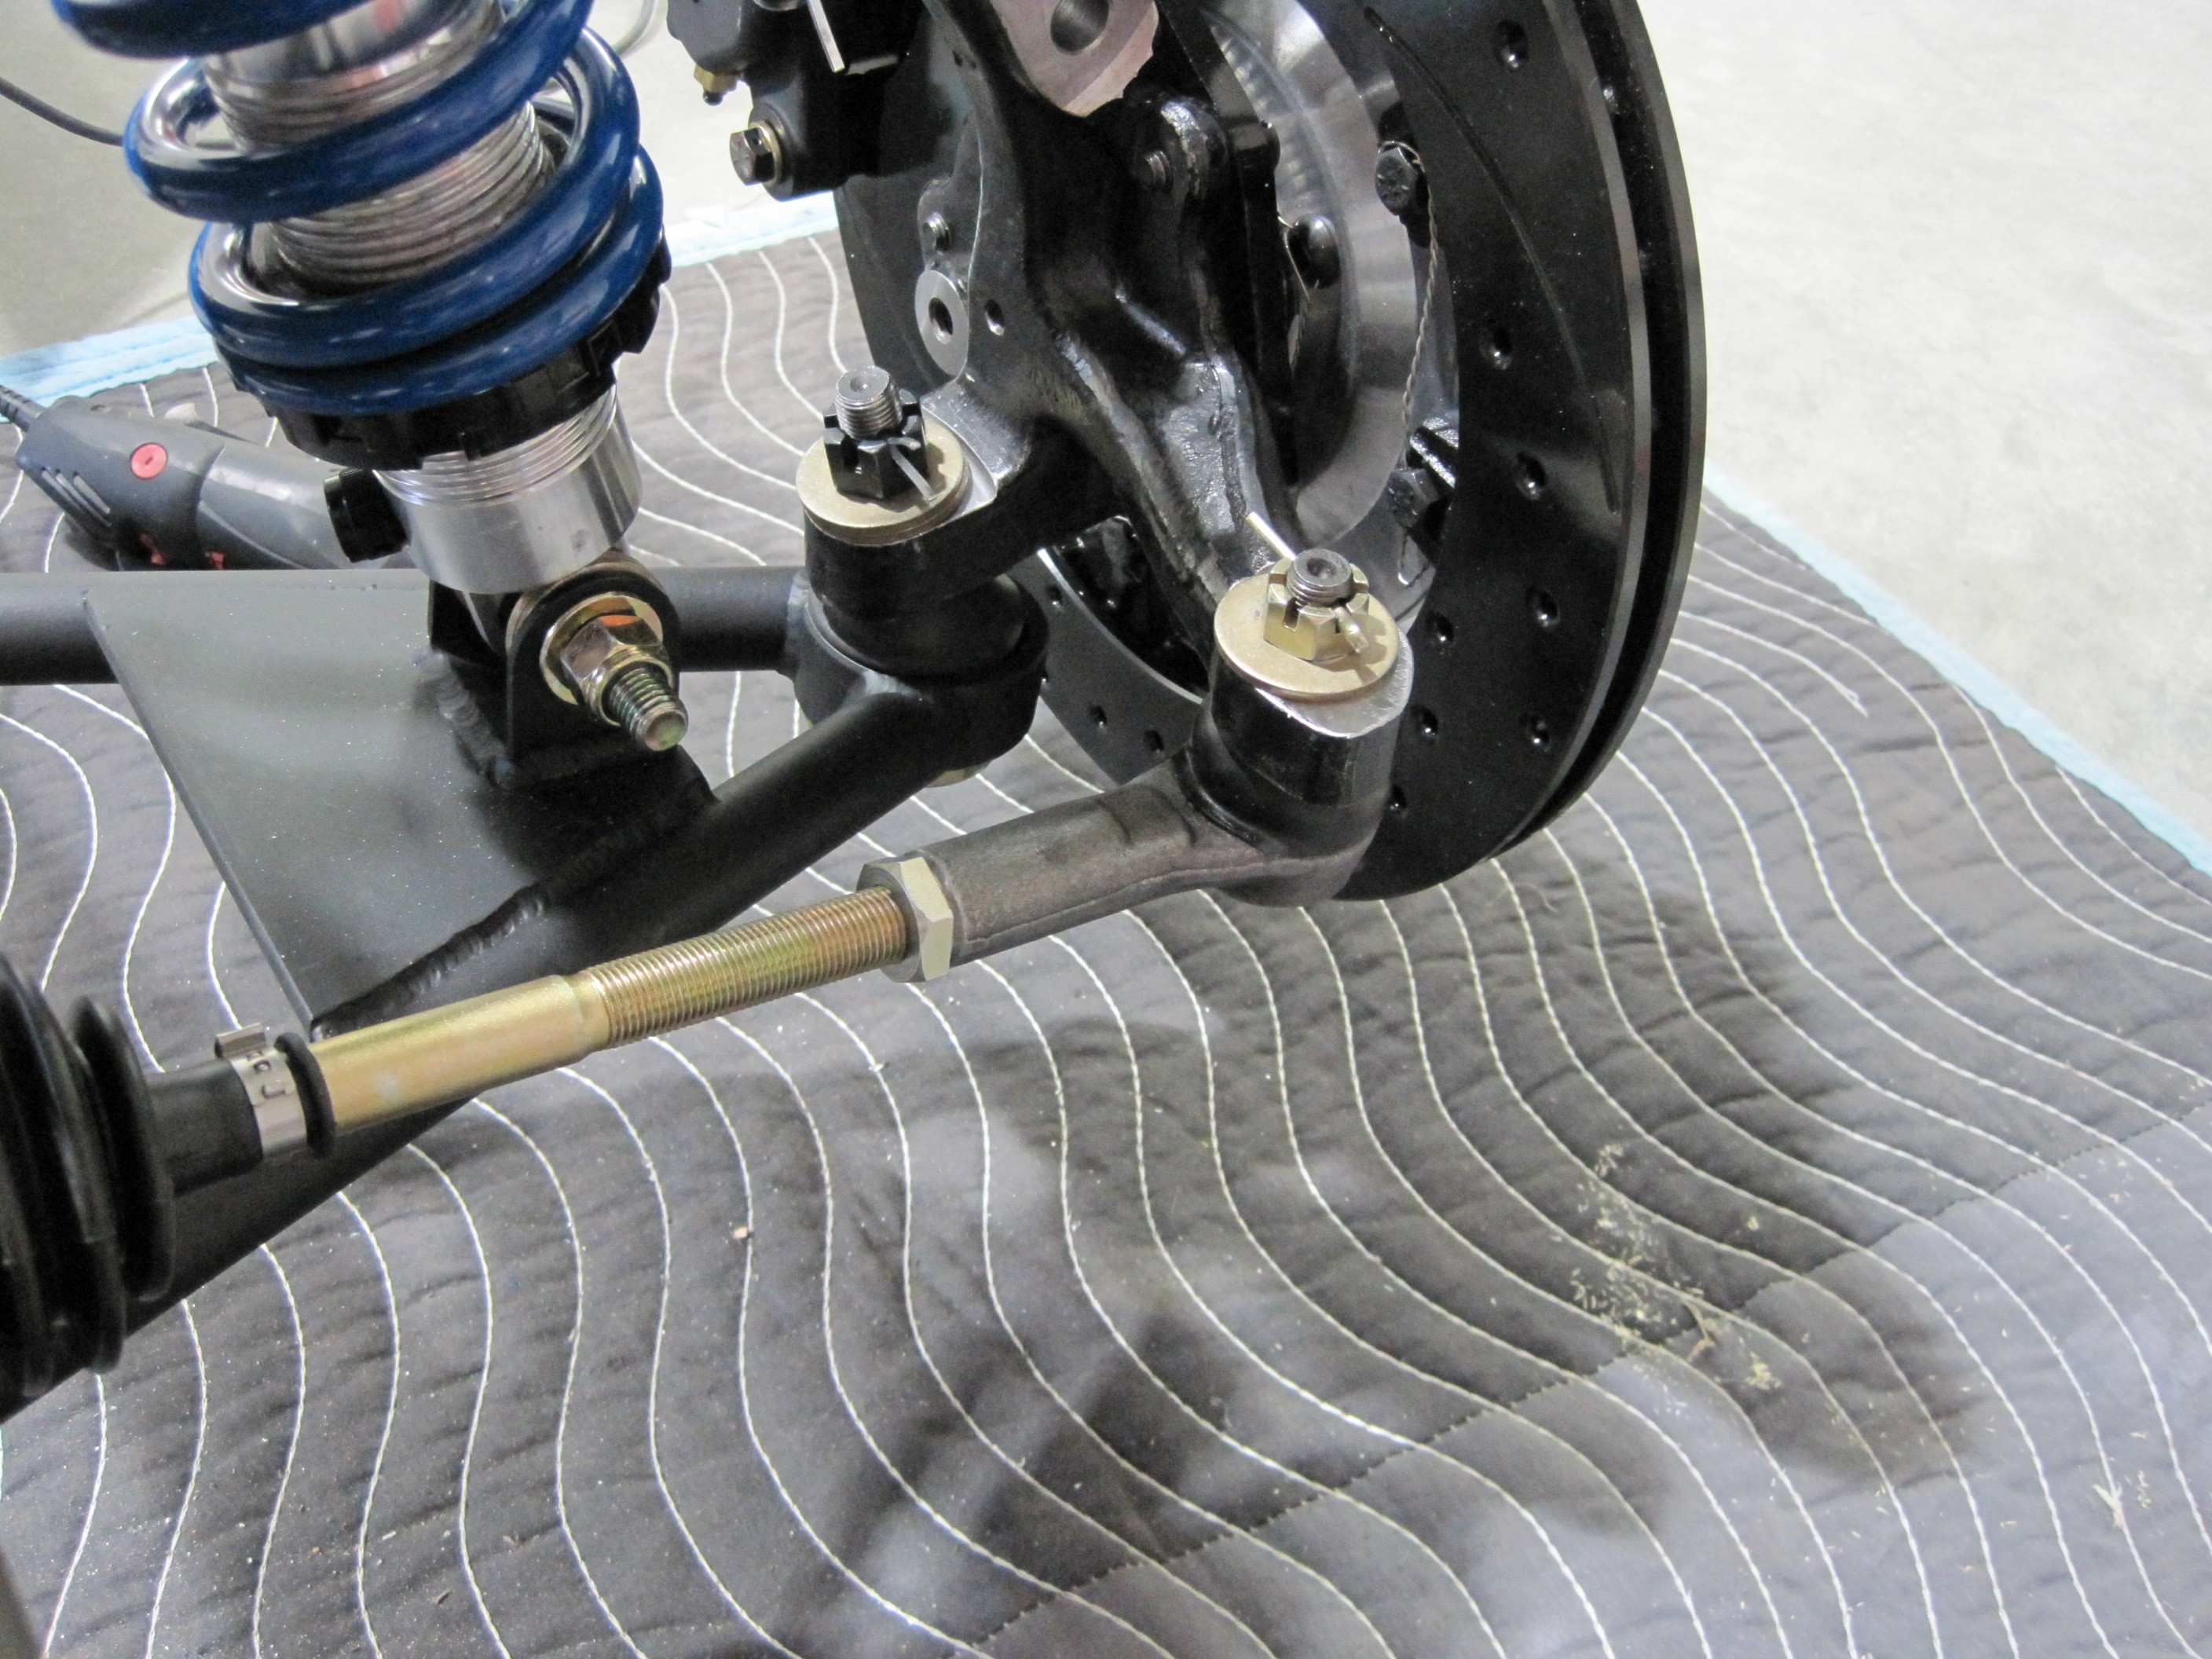
Steering Rack
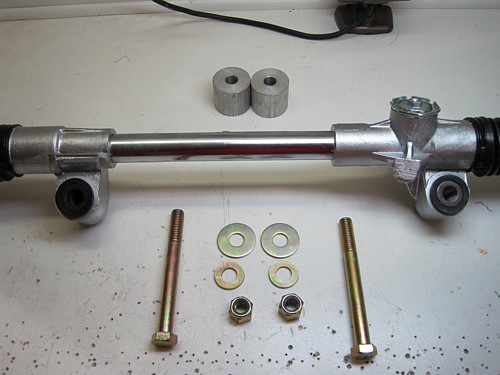
I thought the steering
rack would be a simple bolt and go, but no. It turns out that the
slots in the frame cross member are too small and need to be ground out.
I used my Dremel tool with a couple of grinding bits to smooth out and
enlarge the slots. I then inserted the bushings from the front of the
rack assembly. The rubber bushings are longer than the metal insert
and that is so the bolt head and large washer will smash up the rubber to
create a bumper up against the rack assembly.
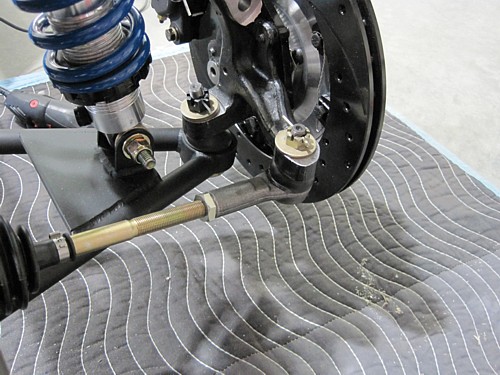
Once bolted in, I
installed the tie rod ends. Most people have trimmed the ends of
the steering rack threaded rod because they are a tad too long. Mine
fit but the tie rods are screwed in all the way which doesn't leave any room
for inward adjustment. For now, I am going to leave them the way they
are because I'm not sure if the steering rack needs to slide to one side or
the other on the frame for radiator/engine clearance. So I will wait
for those adjustments before deciding how much and where to trim the
threaded steering rod.
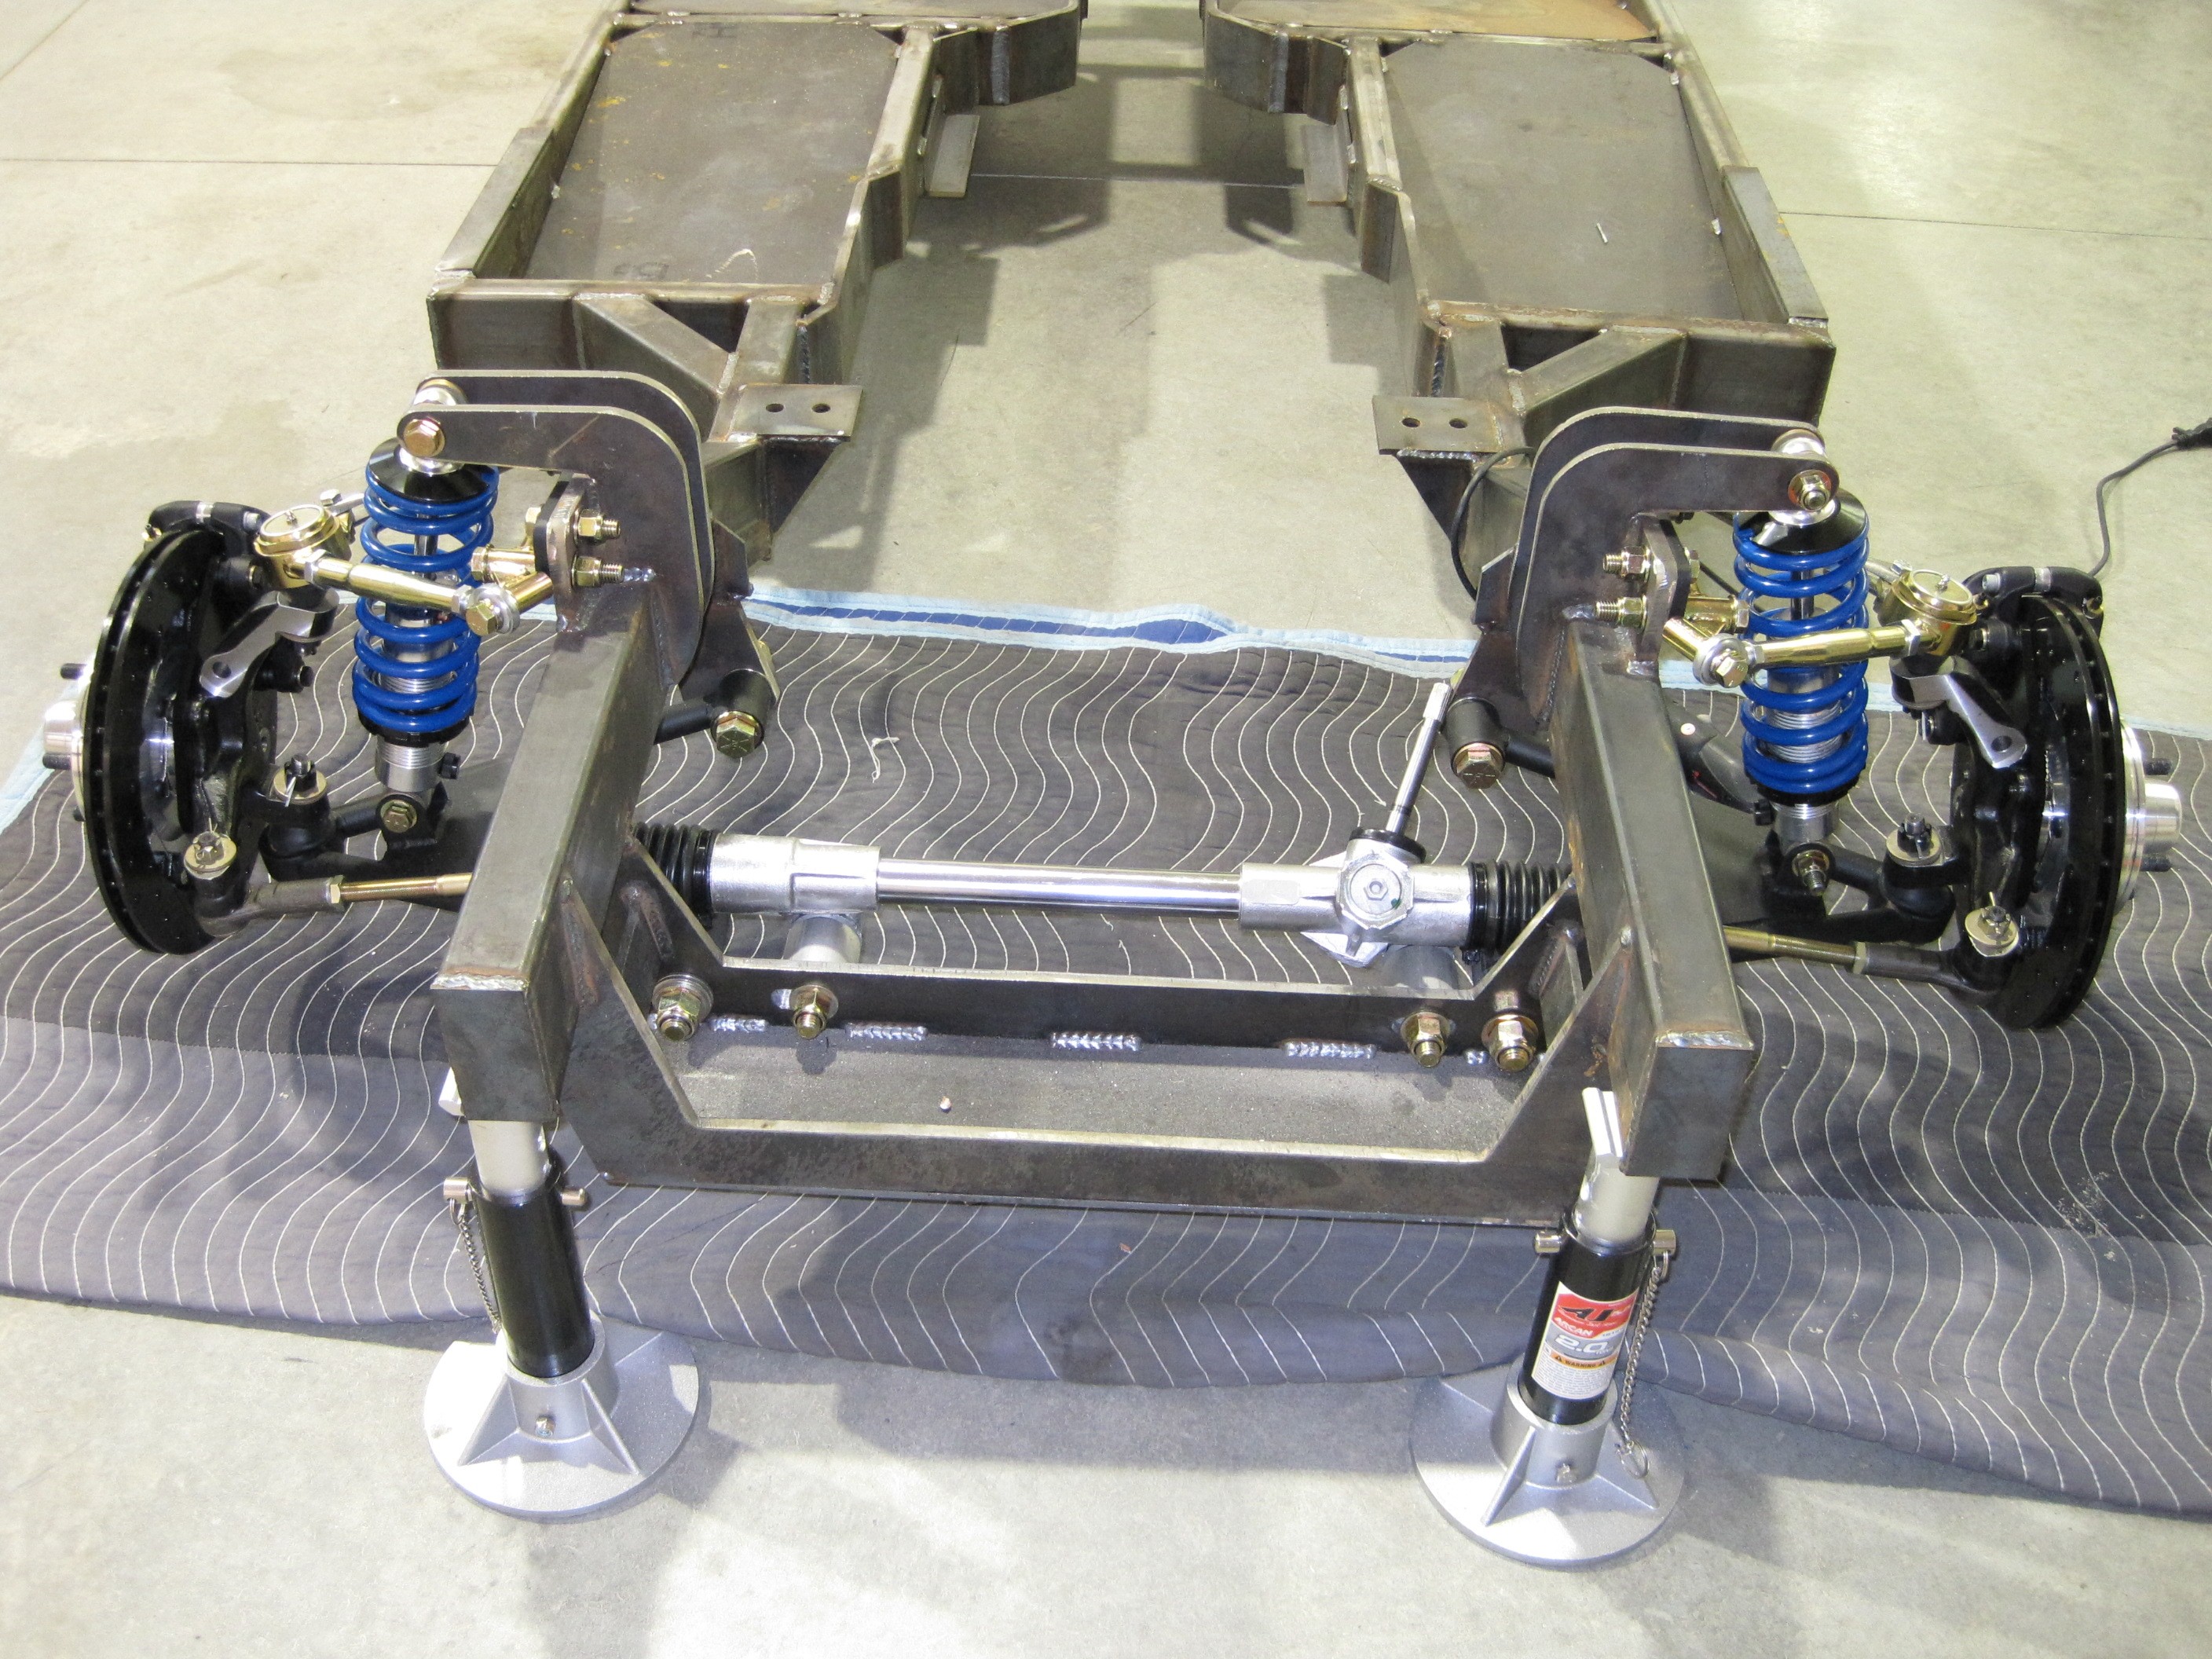
That pretty much
finishes up the front suspension/steering install. Next up is the rear
end.
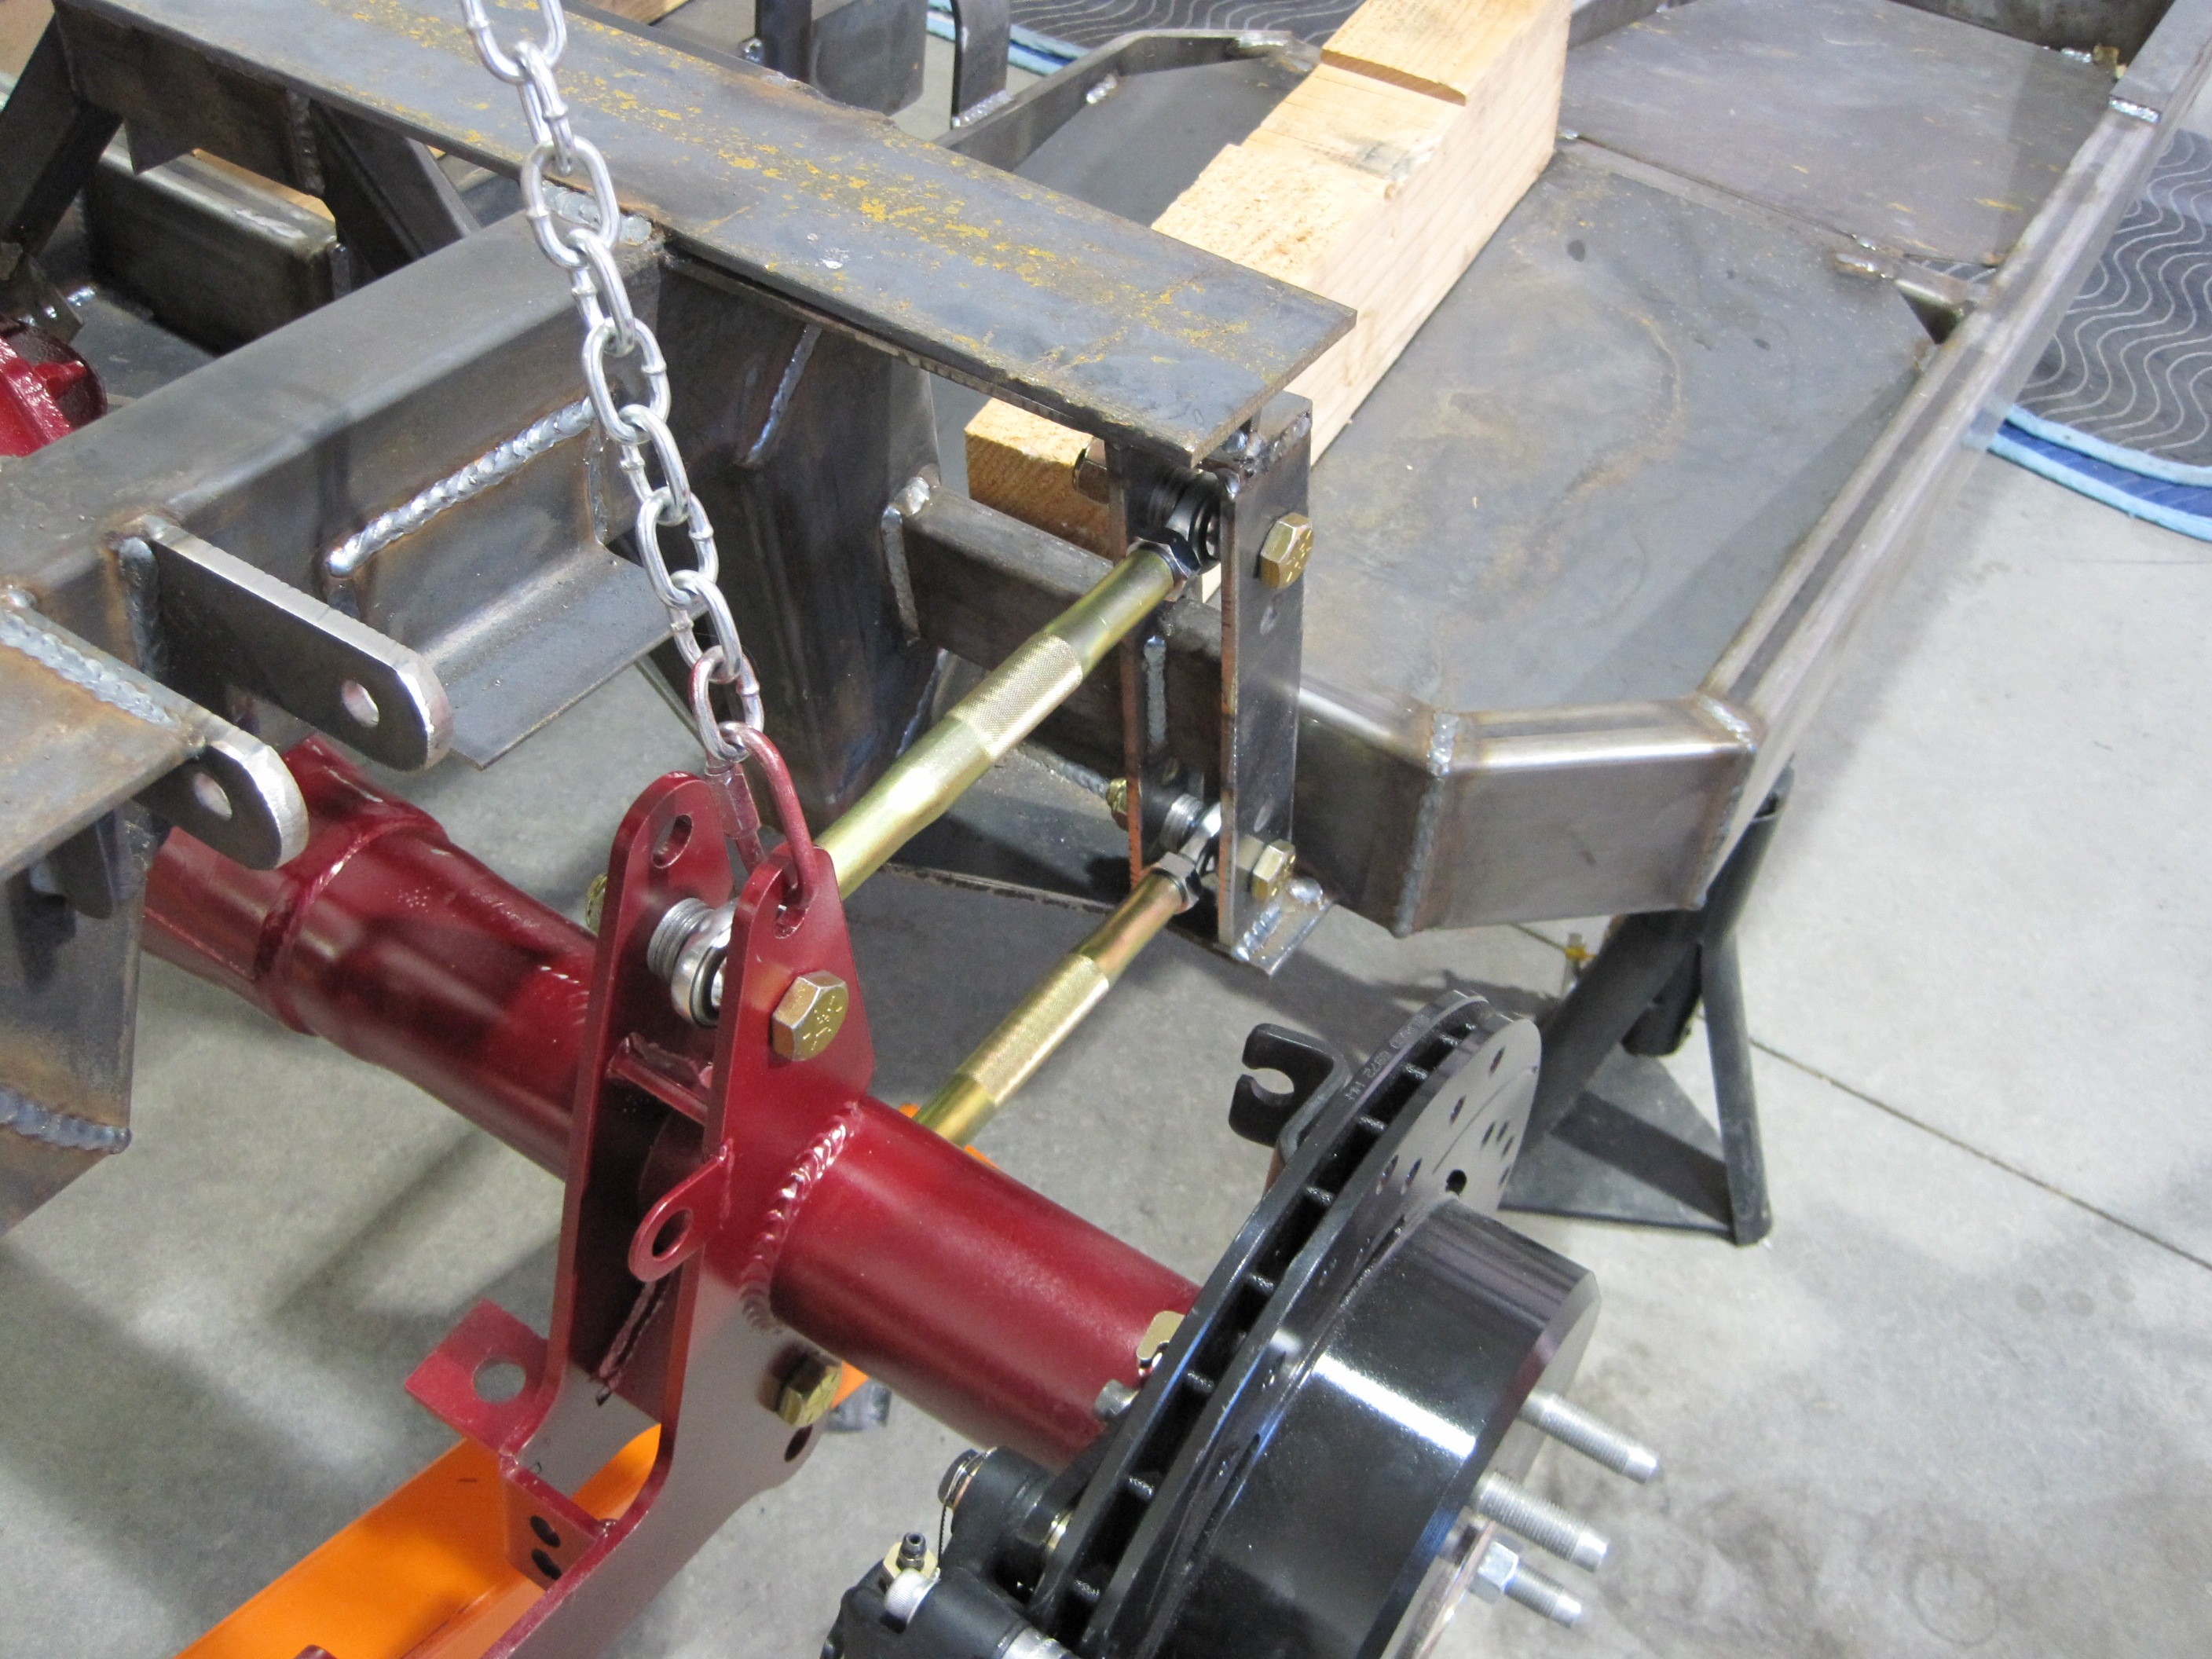
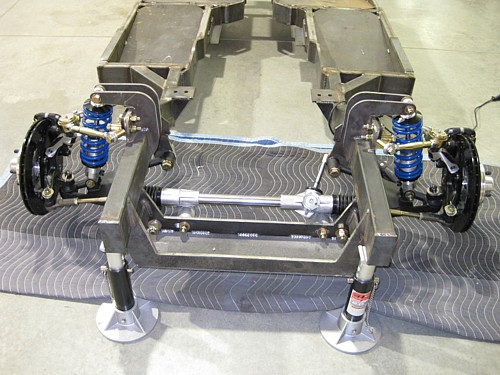
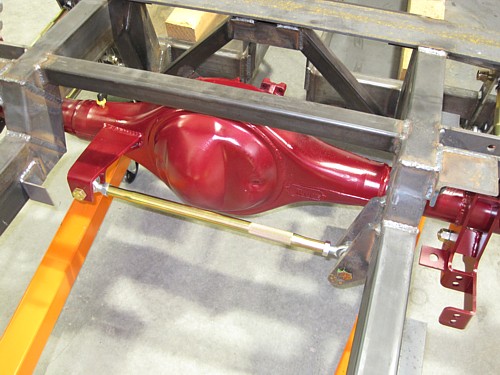
Rear End
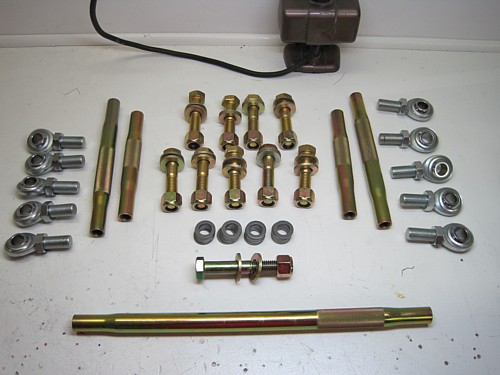
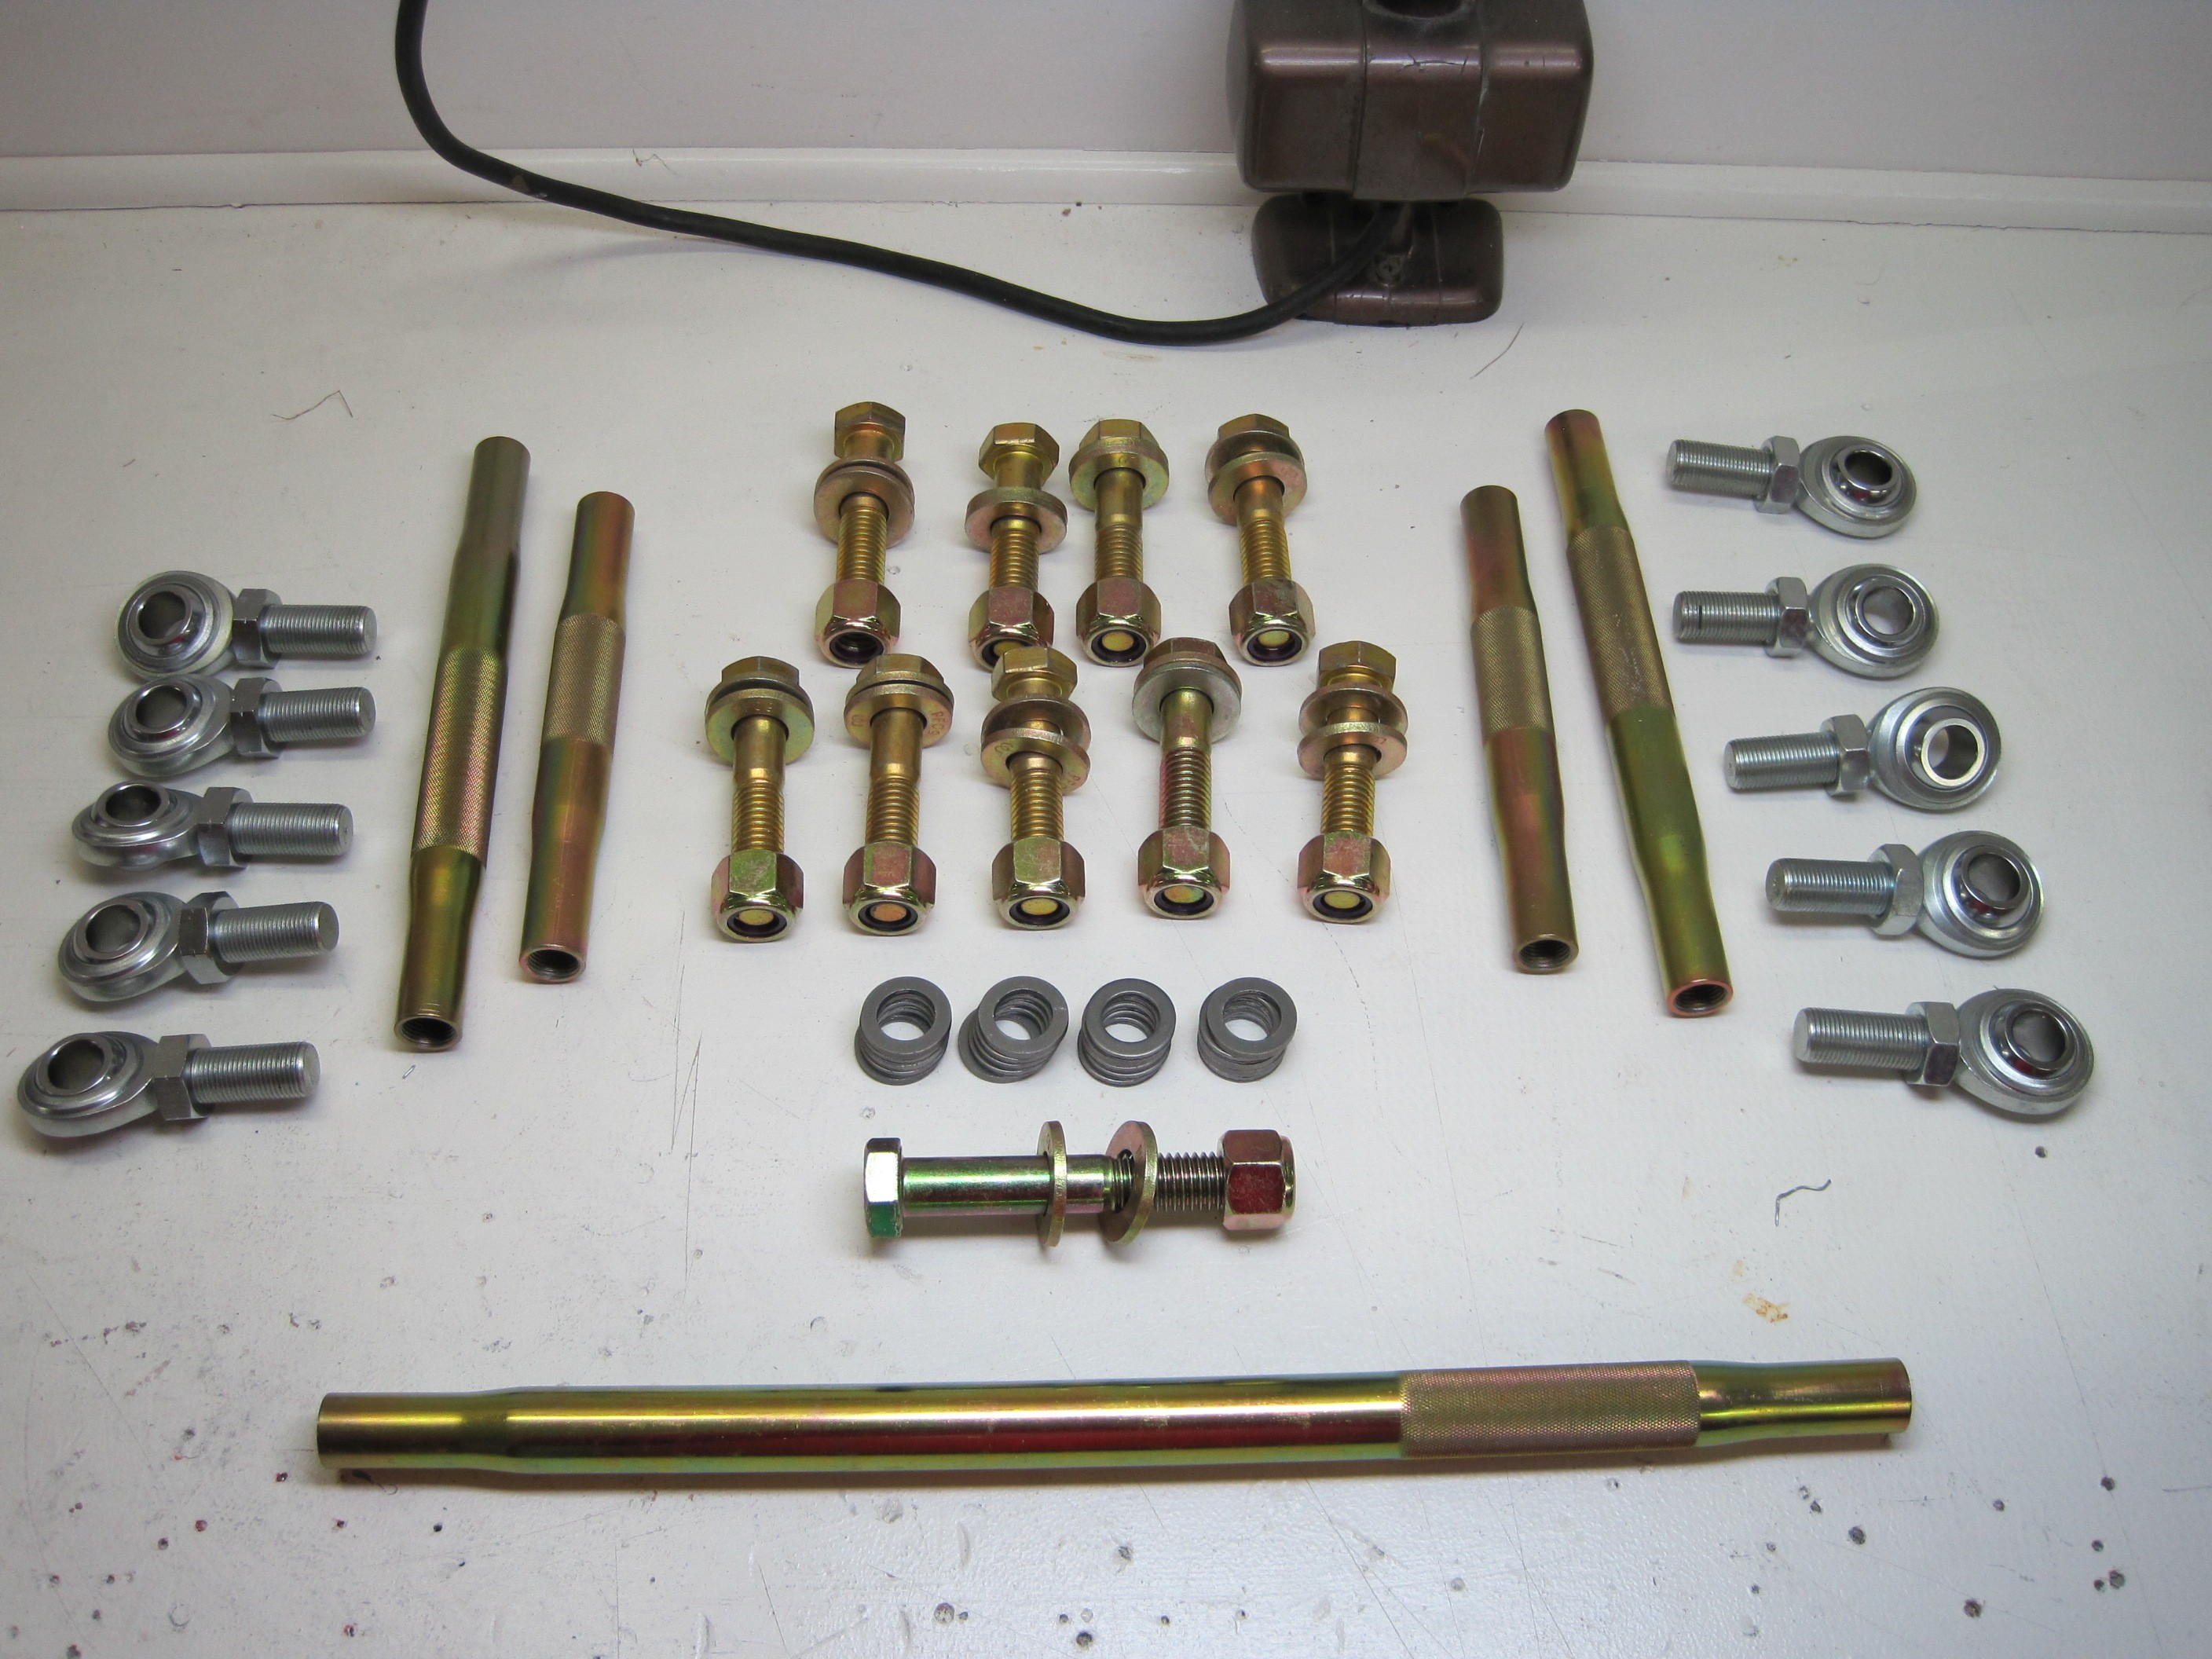
I gathered up all the
parts that connect the rear end to the frame. There are both left and
right hand threads in the bars and the HEIM joints. I assembled each
bar and then installed them on the rear end, in preparation for mounting to
the frame. The short pair of bars go on top, the longer pair go on the
bottom, and the longest bar in the pan hard bar, which connects up across
the rear end. Per some advice from others, I used the second hole from
the top and the second hole from the bottom for the two bars that bolt to
the rear end bracket. I did not use the top holes. All this will
get adjusted later when we do the alignment stuff so for now, just tighten
up the bars as short as they can go.
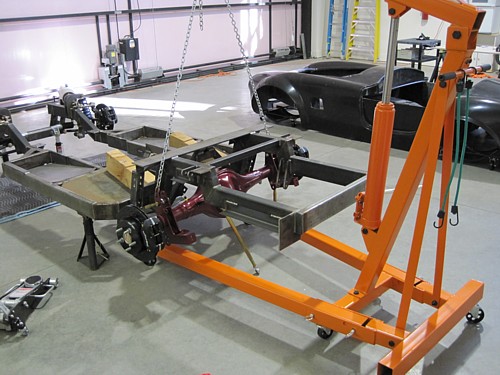
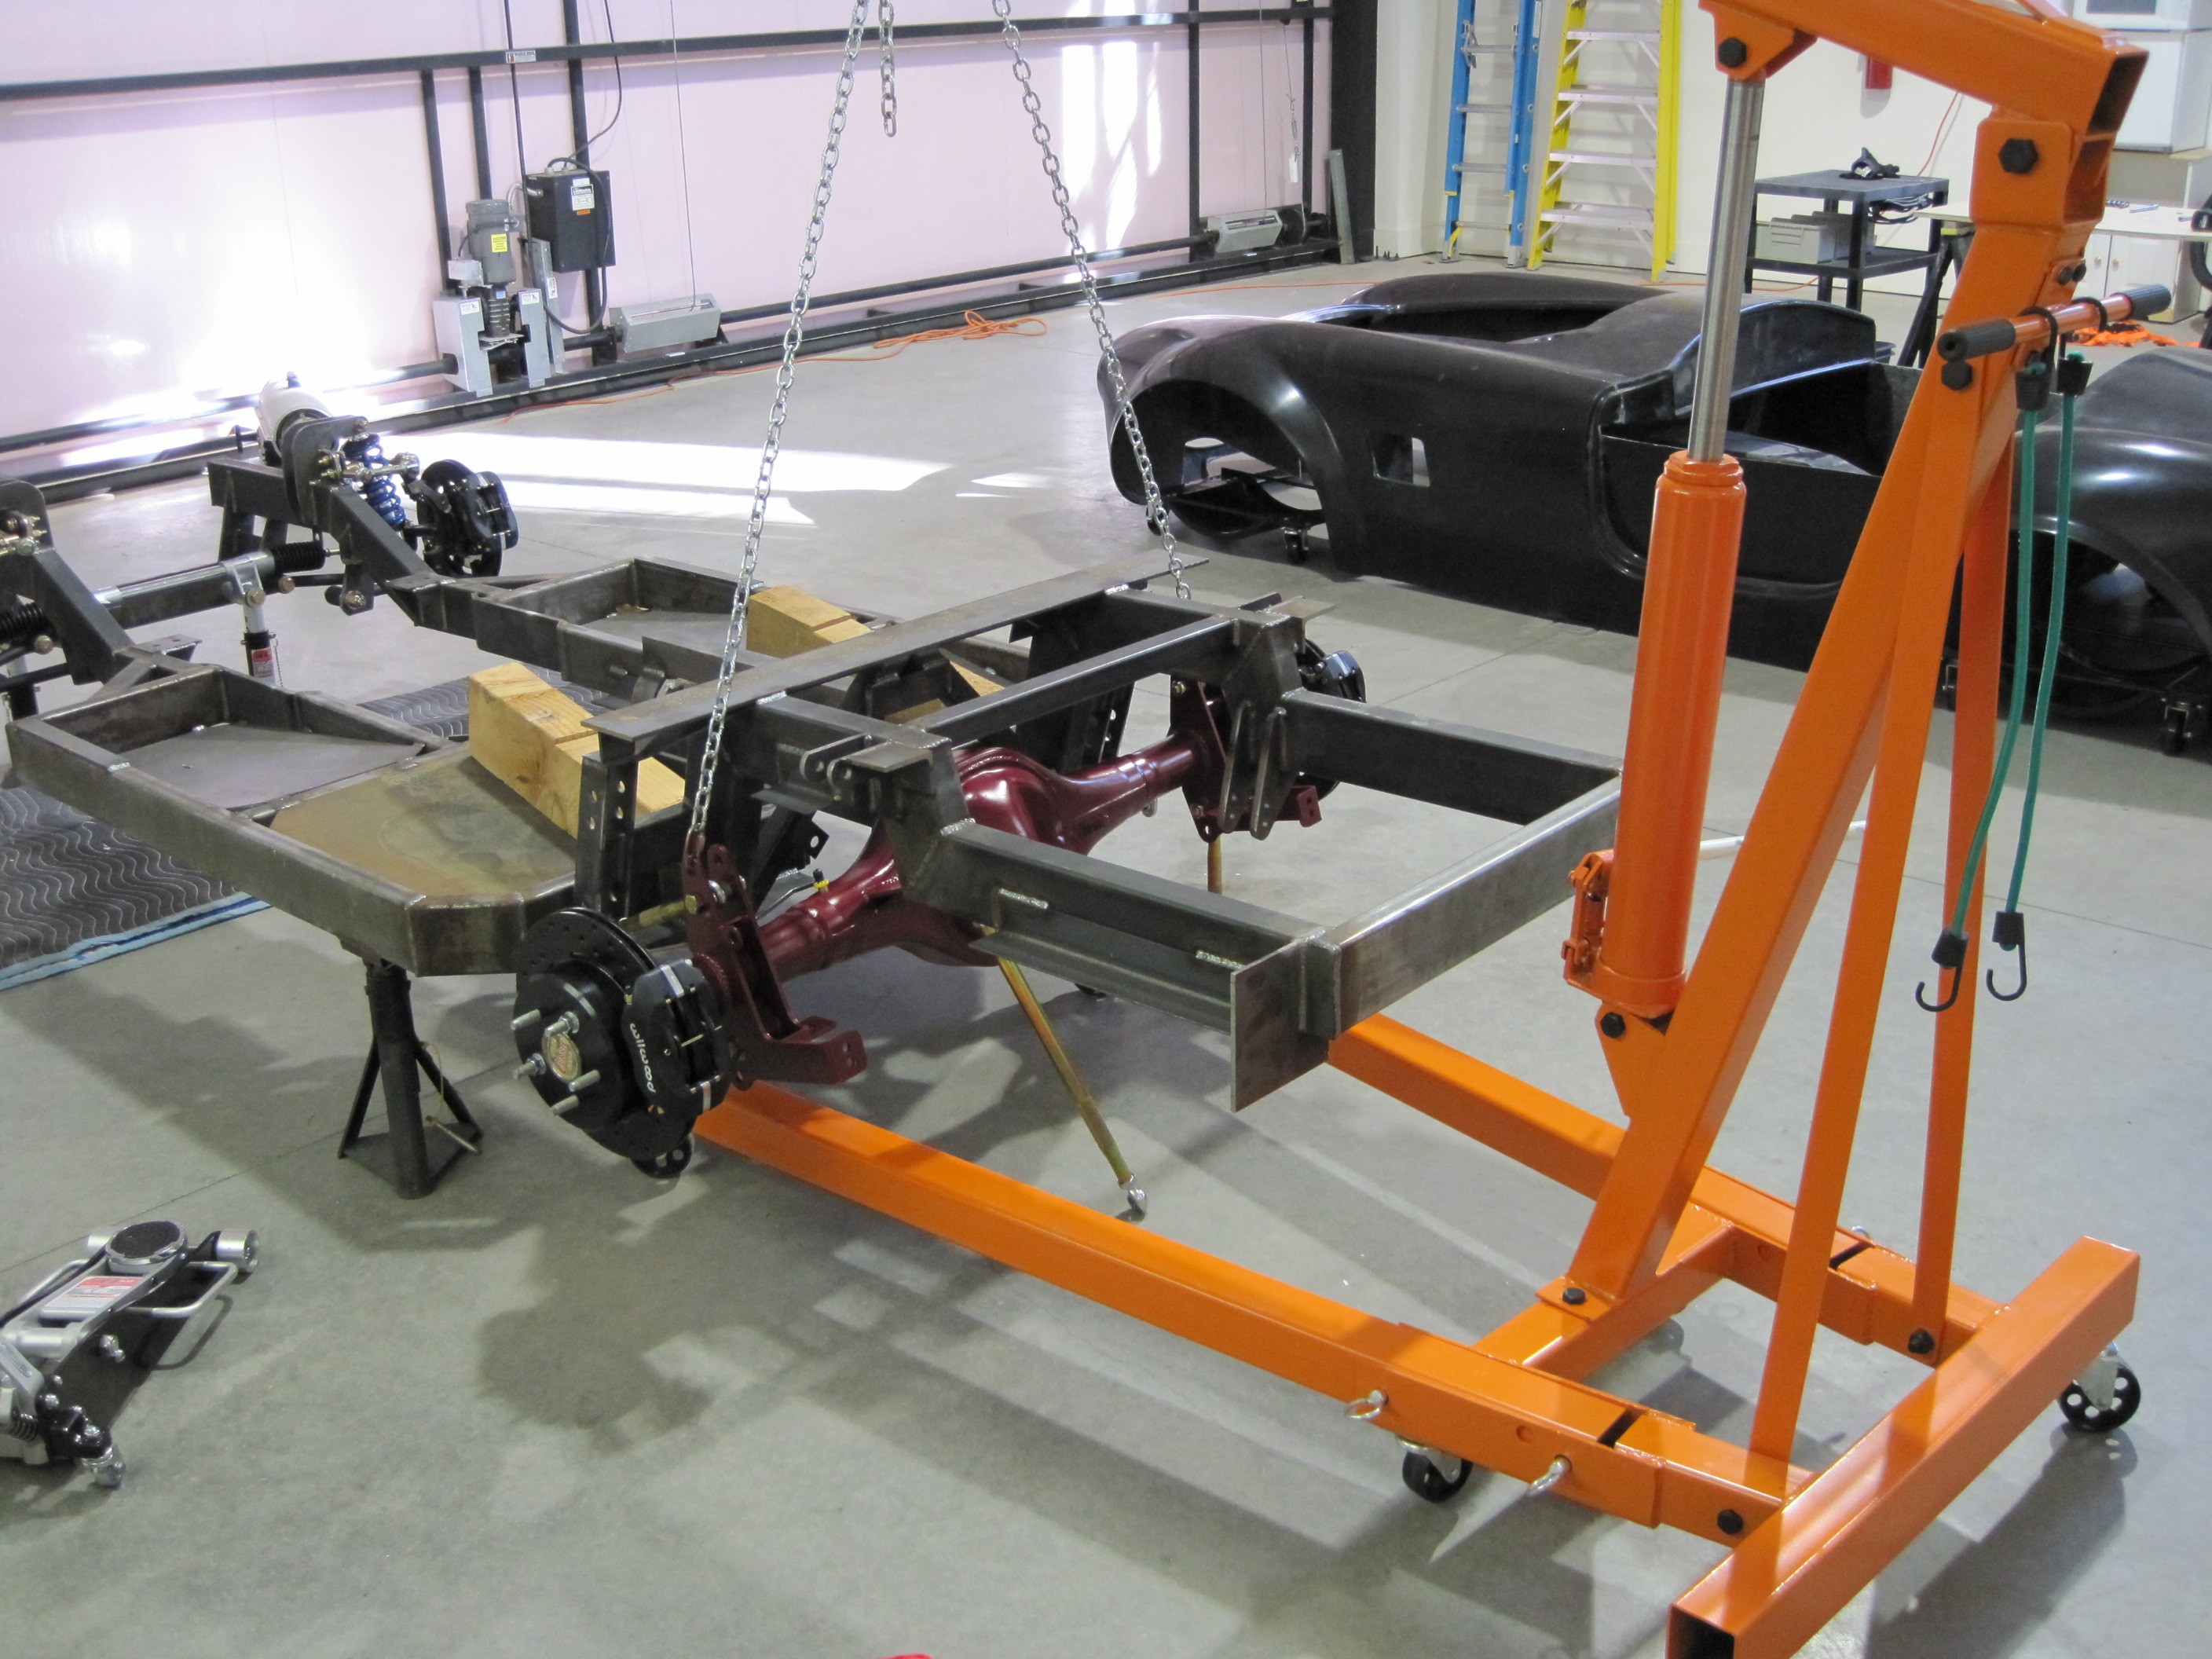
Using my engine hoist
and chains, I was able to position the rear end right up into position.
This worked out really well. Per advice from other builders, I
connected up the bars to the top and bottom holes on the frame.

Here is a better
picture of the holes I used to connect up the bars.
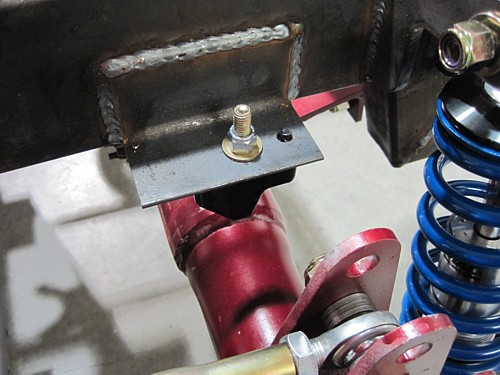
I installed the pan
hard bar in the upper hole. Once the car is completed to the stage of
a rolling chassis, then the pan hard bar mounting hole can be adjusted so
that the bar is level with the ground. This is very important to do,
but there's nothing to do right now until the chassis is further along.
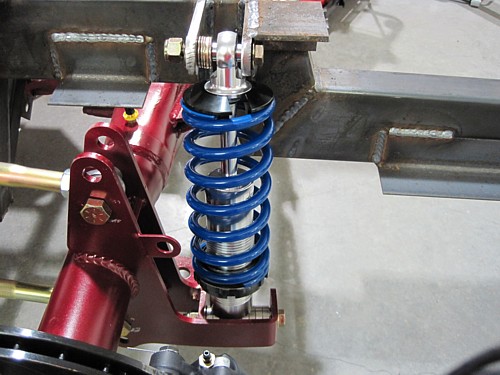
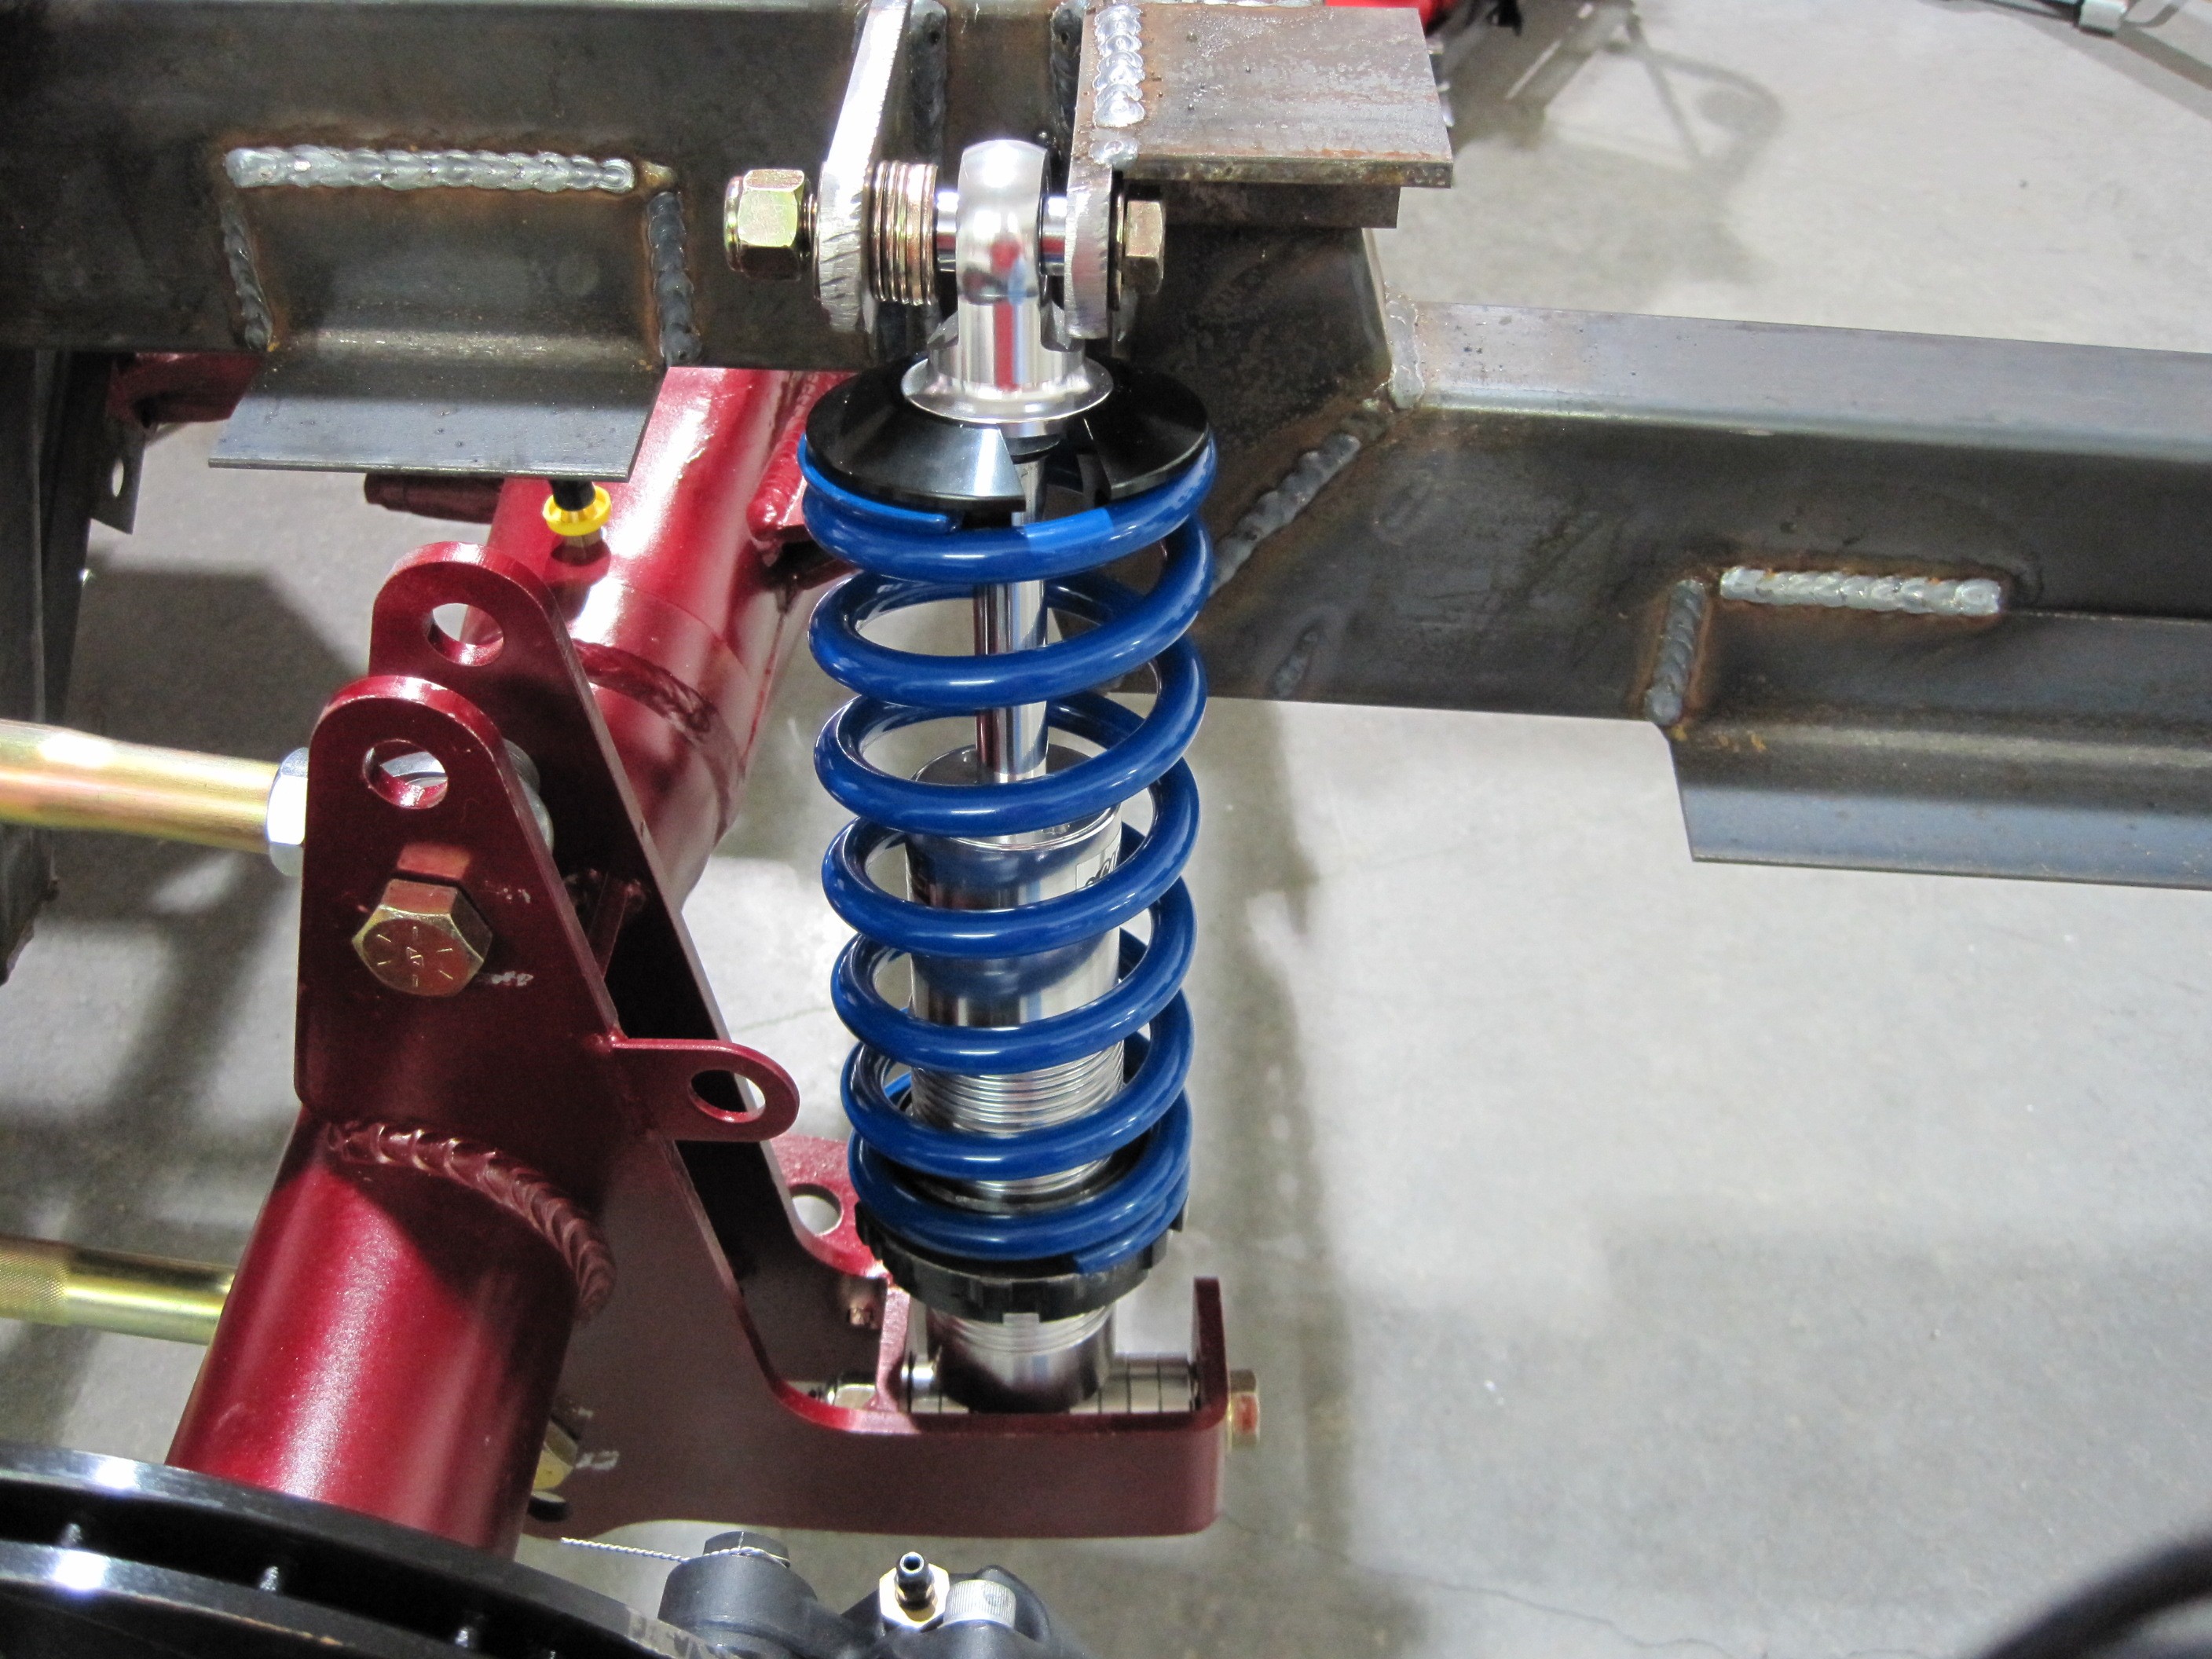
With the rear end
mounted, I assembled the rear shocks in the same way as the front shocks.
Remember that the 275 springs go on these shocks. I did my best to get
them lined up straight but they just don't quite make it as you can see.
I mounted the lower shock bolt in the lowest hole so the car will sit as low
to the ground as I can get it. That limits how far the shock can be
spaced over. Again, the spacing here might all need to change once the
body is mounted so I'm not going to spend a lot of time worrying about it
right now.
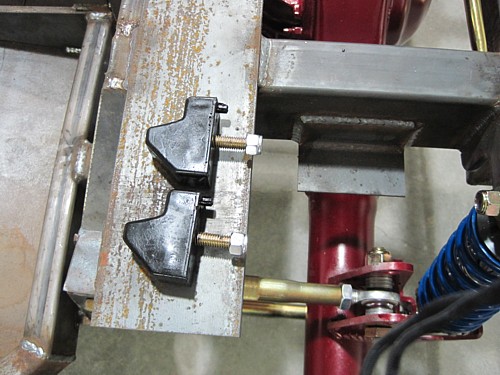
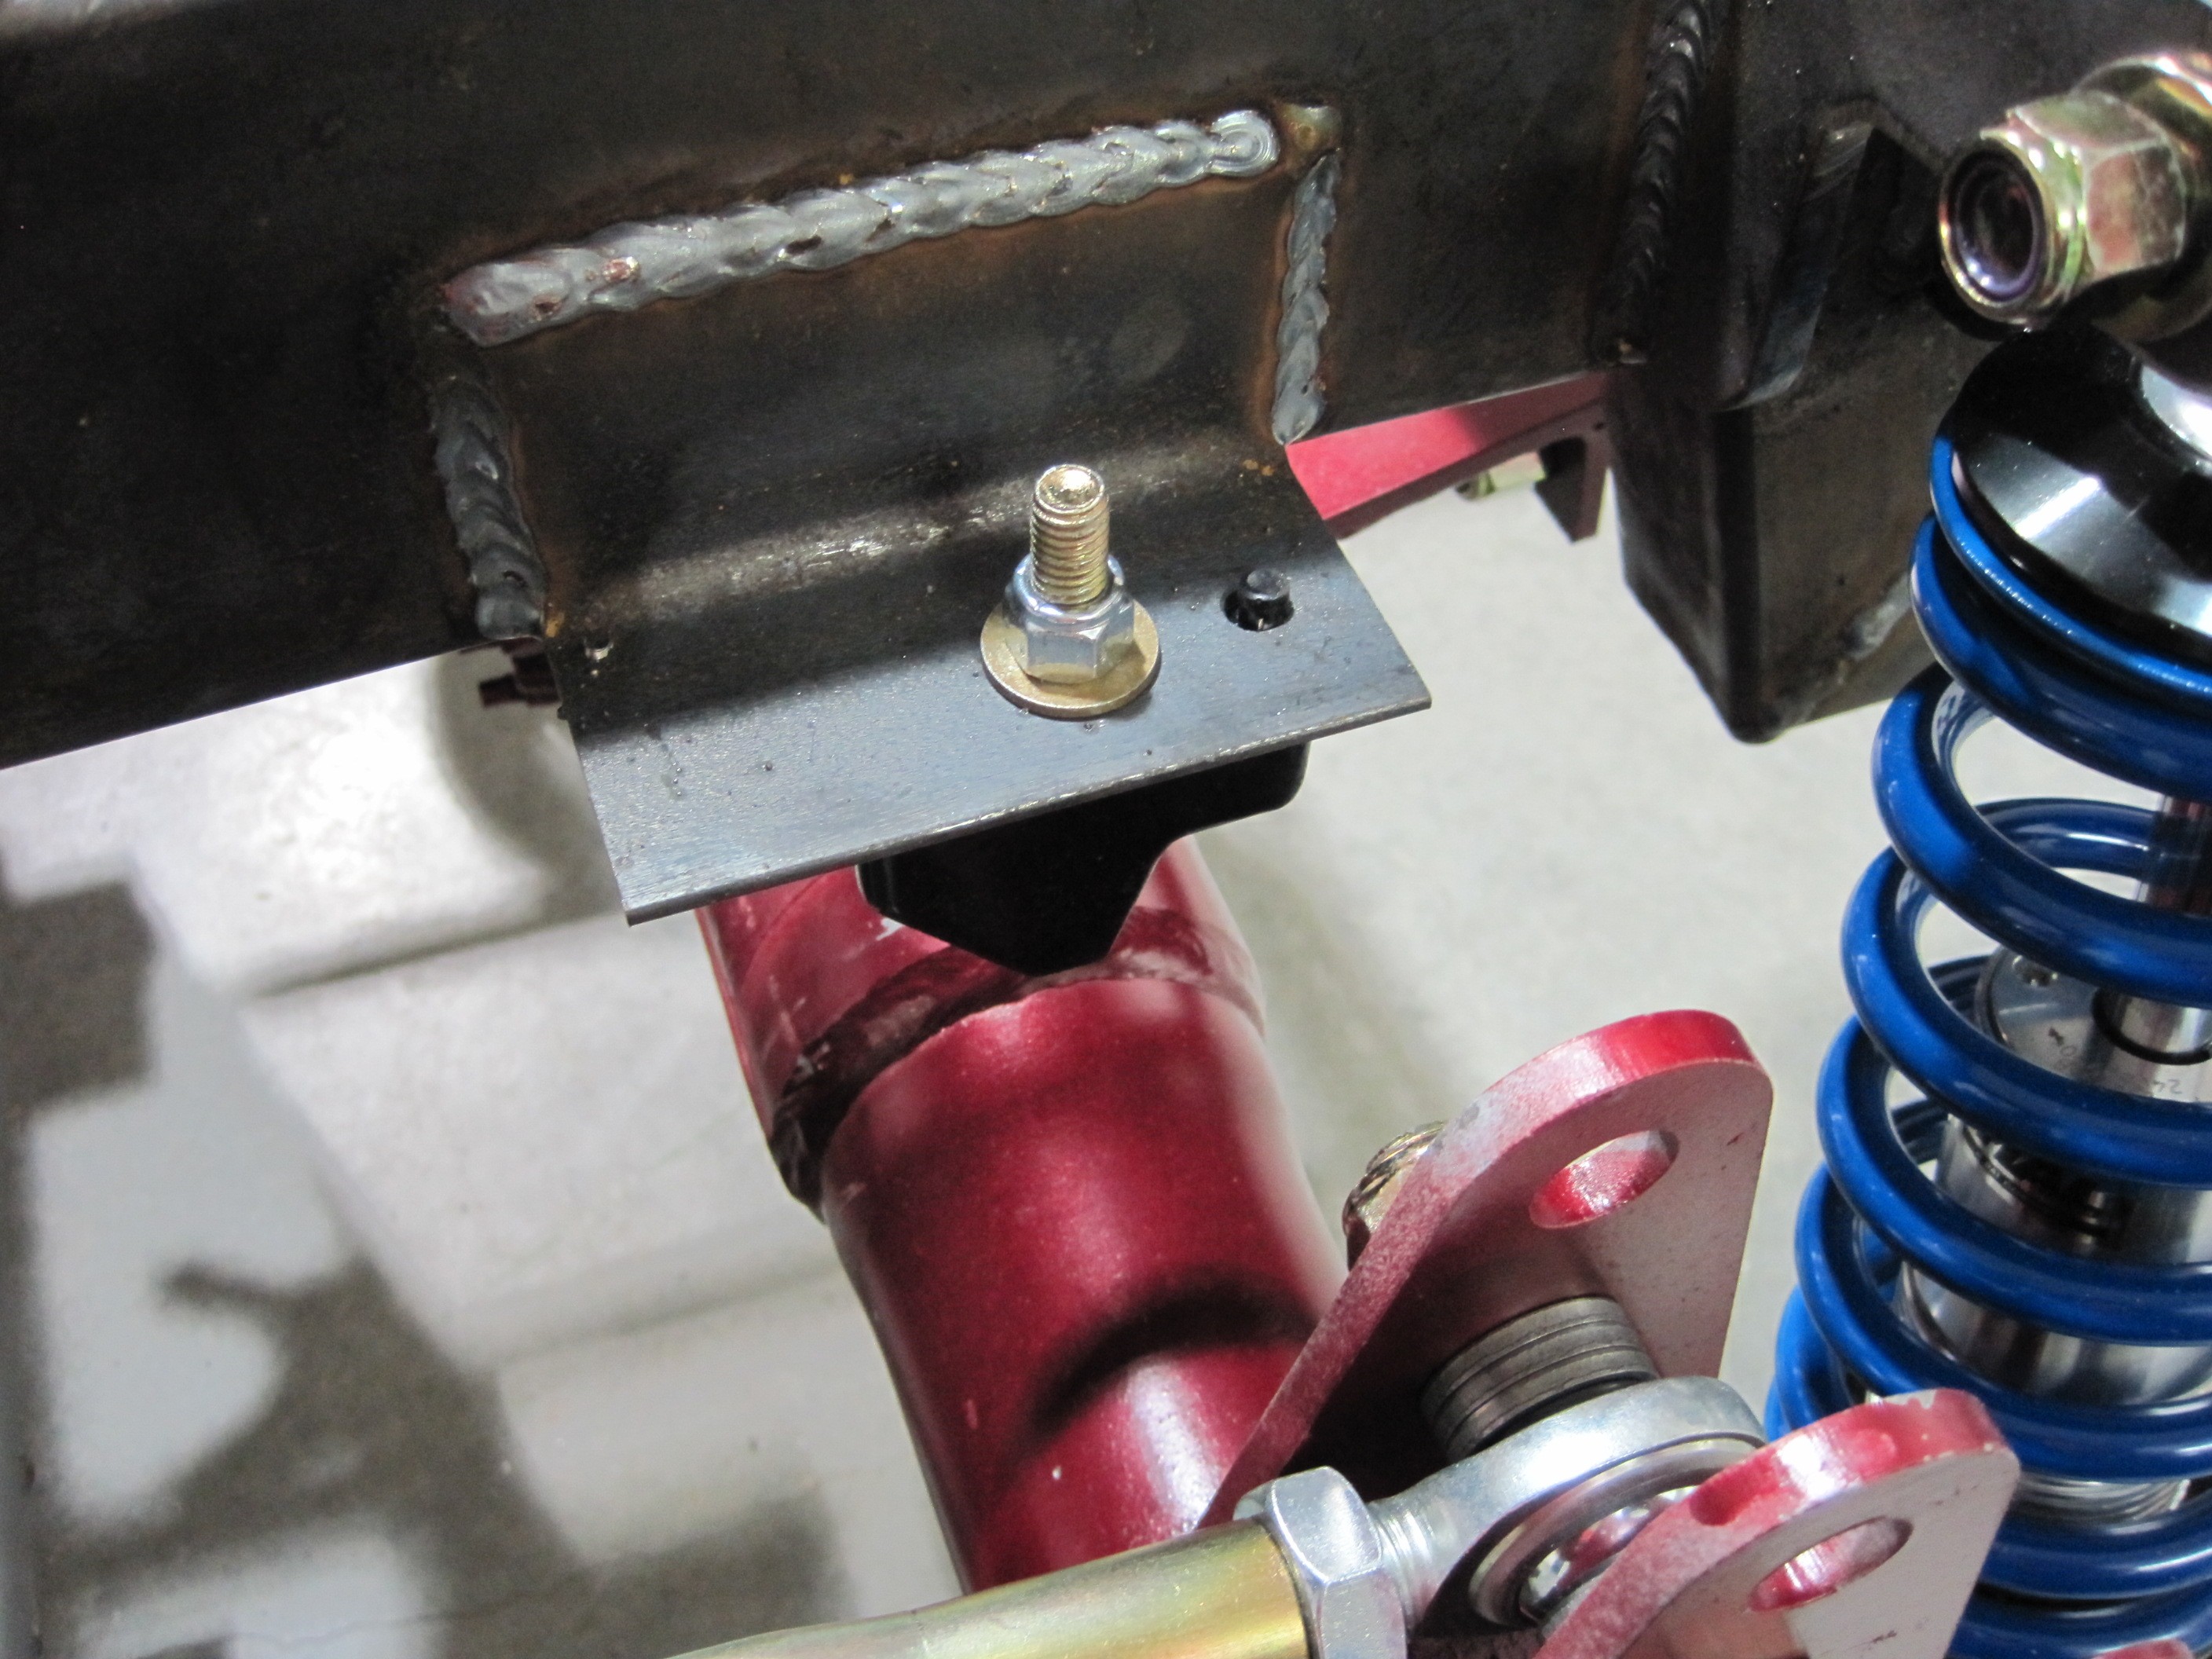
The rubber suspension
stoppers are easy to install. They have a small rubber nub that is
used to prevent the stopper from rotating out of place.
I drilled two holes,
one for the bolt and the other for the nub and tightened them down.
That pretty much
finishes up the rear end. Now it's on to the fuel tank. That
work begins on the next page.
|