
Transmission
Shroud
The last problem to
solve in the front end is to fill the opening where the transmission cooler
usually goes. Since I don't need cooler, I want to fill he opening
with something so you can't see the road through the opening. This
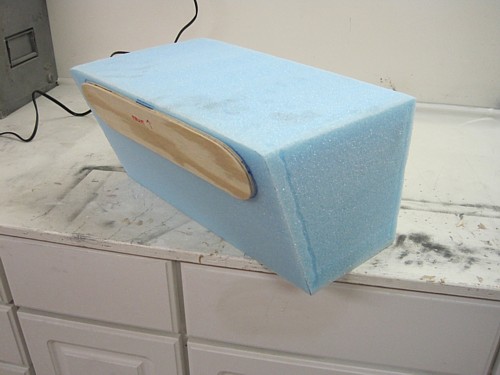
calls for another customized fiberglass shroud. I first cut out
plywood shapes that fit the front opening size. I then cut a rear
template slightly smaller so that the mould can be removed from the part
once it is glassed. I also shaped the blue foam at the right angle to
match the inside lip of the body. I then glued my two templates to the
foam in horizontal alignment with one another.

Using my bargain
basement hot wire tool, I cut away the excess foam to form the core of my
mould.
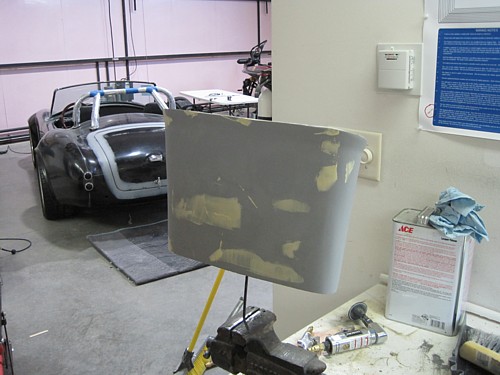
Same as the radiator
cowl, I covered the foam with body filler multiple times and once it was
smooth, I painted it with three coats of white enamel and then some mould
release agent.
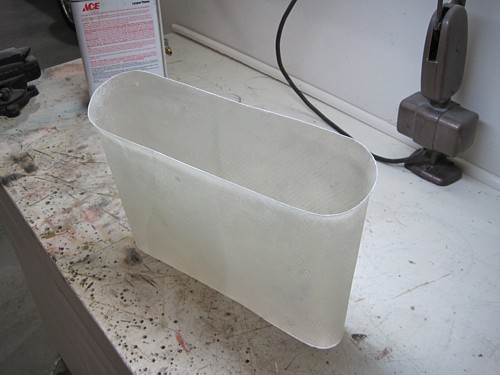
Here is the finished
part after it was removed from the mould. Unfortunately, I had to
destroy the mould to get the part free. I think I glassed the part
before the mould release agent was fully dry. As a result, the part
would not release from the glass the next day. It was stuck real good
so I'm sure my impatience was the cause. Oh well, I'm probably not
going to make another one anyway.

I fit the part to the
body and as a result, I trimmed the front and back edges a couple of times
until I got the fit I wanted. I wanted the finished part to fit as
close to the front cross member as I could while still giving me room to get
the part on and off. Once it was fit, I fabricated a couple of
mounting clips that I then riveted to the rear edge of the shroud.
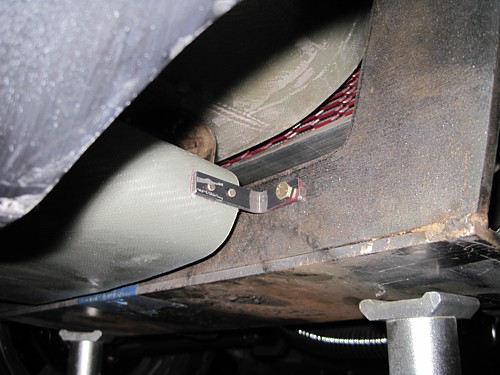
Here's a shot of the
shroud bolted to the cross member, one on each side. These two bolts
are the only mounting clips holding the part to the body. The front
edge floats free and holds the grill mesh in place.
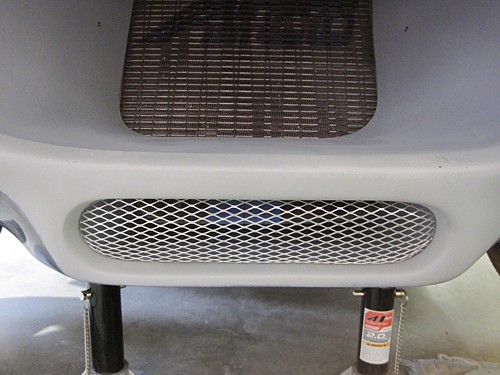
Here's a shot of
the finished product. It holds the mesh tight while providing a
finished look. Mission accomplished.
Next up is to
complete some interior details, then the car can be disassembled and
painted. It's getting close. The interior work begins on the
next page.
| 


